What is OneNote? If you haven’t heard of this program before then it is about time! This is a hidden gem in your Office-suite. In this post, I’ll cover the basics of the program and how to get started with your first notebook.
First of all, there are several different versions out there of this program. At the top of my mind I can think of:
- OneNote for the web (used in Office 365)
- OneNote for Windows 10
- OneNote for Mac
- OneNote 2016
Apart from these computer versions of the program, there are of course apps around for smartphones and tablets. In this post, I’ll focus on the computer-based Windows versions and how to get you started, but I will get back to the differences between versions in posts to come.
How to Get Started With OneNote
So what do you need to get started? First of all, you need a connection to Microsoft either by having an e-mail address (usually ending in @live or @outlook or something similar) or by having a Microsoft account. This works for both personal and professional accounts.
Second of all make sure you have access to cloud storage! If you use Microsoft products then OneDrive is your natural go-to, and if you use OneNote for Windows 10 then this is your only option. Once you got this figured out, it’s time to create your first notebook. One thing to keep in mind is that sometimes it takes a while for the program to sync to the server. You can notice this if you have your notebook open on several devices at the same time.
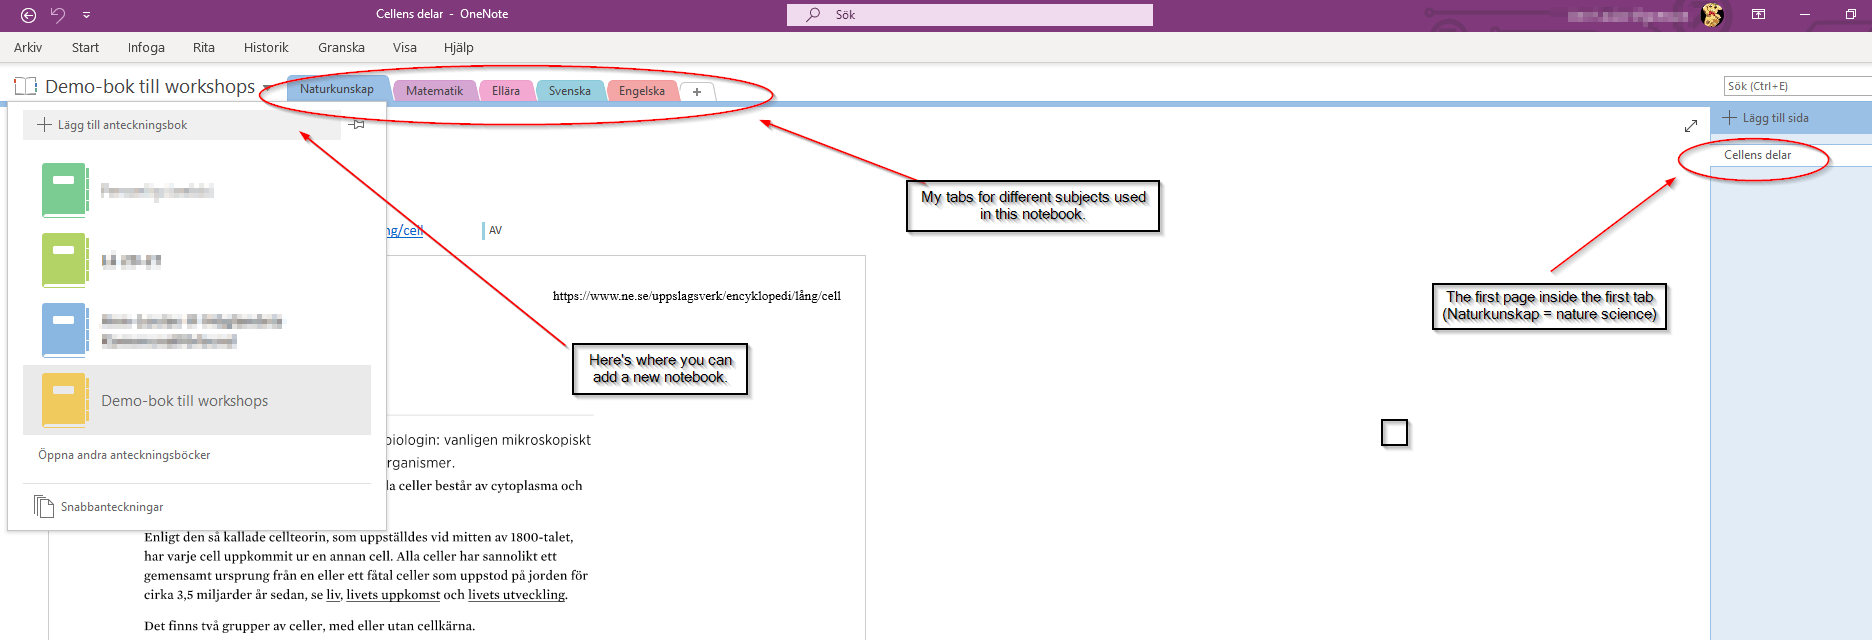
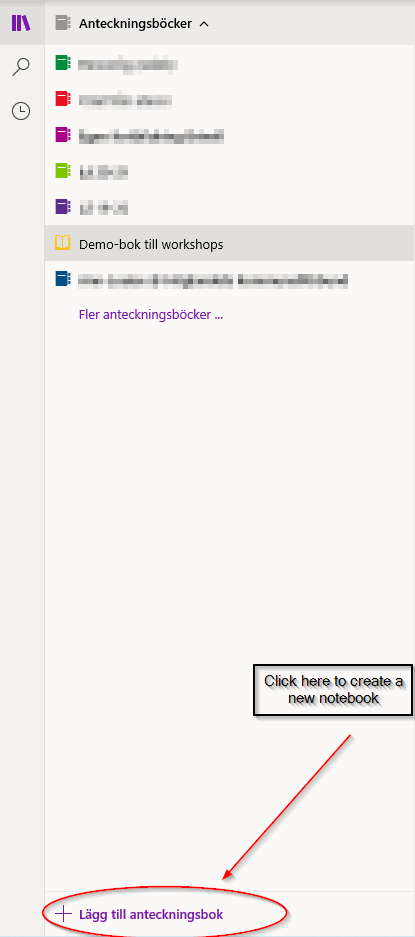
OneNote creates a sample notebook for you so you can see a bit more of what the program can do, but I suggest you create a new notebook that you plan to use. Click on the notebook you’re in to get access to a dropdown menu and select Create a new notebook. Give your notebook a good name and choose a color to go with it – this can be helpful later on if you decide on using multiple notebooks. You can force the program to sync if you notice that it’s not syncing the way it should.
Apologies in advance, but parts of the screenshots will be in Swedish ???? Hopefully the language won’t be a barrier in this case though.
Microsoft has moved things around a bit between the versions, but you can find more or less the same things in either version. The OneNote for Windows 10 version is close to the one used in OneNote for the web found inside Office 365, and if you use an iPad and the OneNote app you will also recognize the layout below.
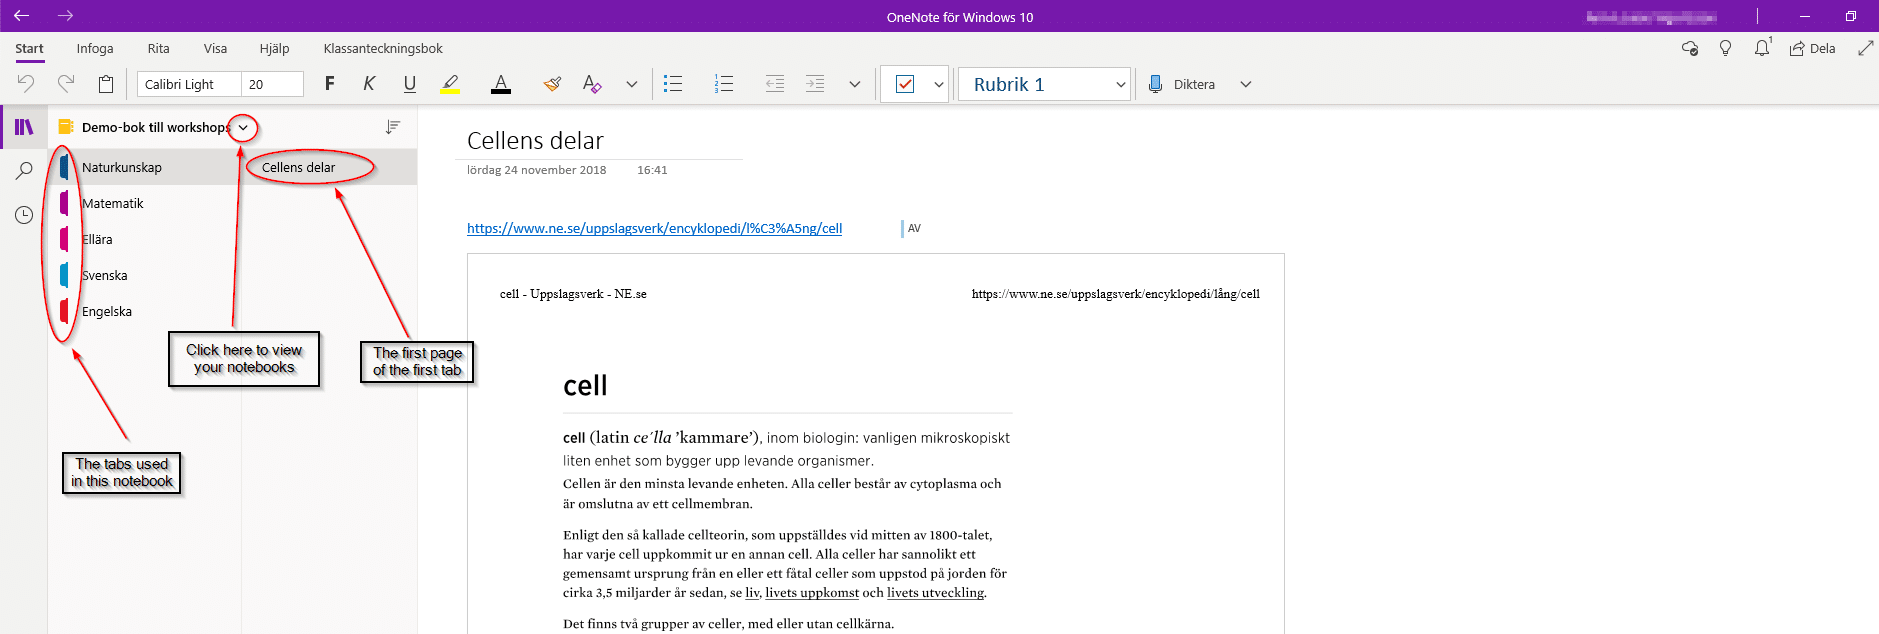
One of the things Microsoft moved a bit between the versions is where you go to create a new notebook.
Basic Features in the Program
A notebook in OneNote works much in the same way as a notebook with multiple tabs for different subjects. In the program, you can create sections and pages. Sections work like your tabs and you can name them for example by subject or use. Inside each section, you create pages, which work just like regular pages in an analog notebook.
You have access to regular writing tools and ways to format your writing, including using highlighters, making handwritten notes (if you use a stylus), adding links, adding pictures or pdf:s, etc. Making a table in the program is also a simple task, just write something and hit that tab-key of yours to get started.

A tip: give your pages a good name, this becomes very helpful when using one powerful thing and that is the search function of the program. As long as you remember at least parts of what you called your page, you can always find it using the search function. I use OneNote both personally and professionally and when taking notes I always include the date for the meeting, conference, and so on. This makes it a lot easier to go back to later on.
Examples of Other Useful Features
Another good feature to use in the program is tags. Tags in OneNote are different from how you use tags online, but you can either use the tags included or create tags of your own. Tags in OneNote can be used to highlight things, make checklists, and so on. If necessary you can also have the program make a reference page of all tags you have used, either in that section or in the whole notebook.
Other useful things this program can do are:
- Get text read to you or make the written text more clear by separating words into syllables or highlighting grammatical structure using Immersive reader
- You can include printouts from other documents such as pdf:s, to be used for digital notetaking with inking, and highlights used in OneNote.
- You can listen to or record your audio recordings.
- You can embed videos or audio by inserting hyperlinks on a page in the program. Currently, the video player inside OneNote works with videos from YouTube, Vimeo, Ted Talks, and many more. You can take a look here for the complete list of supported services you can embed.
- You can scan documents by using the app version of the program on your phone – no more need to keep unnecessary papers around!
Conclusion
To summarize why you need to make this program a part of your daily work, I can’t stress the usefulness of it enough! Personally, I use it as a way to take notes, plan out lessons, create a collection of recipes and so much more. Even if I don’t use all the features of the program I can still see how this program can be both of use to me as a teacher as well as why I should show and teach my students more on how to use it.
Have you tried using Microsoft OneNote yet? For some more ideas try these posts to learn more about:
2 comments