
In a previous post, I shared how to create email rules in Outlook on the web. This time, let’s dive into the world of Gmail and explore how to set up email filters for a more organized and efficient inbox.
Whether you’re using Gmail for personal or professional purposes, mastering its features can significantly affect your email management. Gmail is a web-based, free email provider that offers a range of functionalities to help you stay on top of your emails. While the basic service is free, you can unlock additional features and tools with Google Workspace (formerly known as G Suite).
Creating an account is simple, though you might want to skim through the fine print (or the user license agreement) if you have the time! Once your account is set up, you can access Gmail through a web browser or your favorite app.
What Is Gmail?
Gmail is a web-based, free email provider. Or rather, it is free to use but if you want a bit more out of your account Google Workspace (previously branded G Suite) is the way to go.
Signing up is free, but I dare you to try and read the fine print (or the user license agreement) in full! Once you’ve created your account, simply log in using a web browser or your favorite app version. You can use Gmail on both Android and iOS devices.
Why Use E-mail Rules?
As mentioned in a previous post about Outlook, and mass cleaning your inbox, using e-mail rules can be an easy way for you to have an organized inbox without really thinking about it. Set once, enjoy your inbox! It can save you time and make your inbox feel, and look, more manageable.
How to Create an E-mail Filter in Gmail
In Gmail, you use filters (in Outlook, they’re called rules).
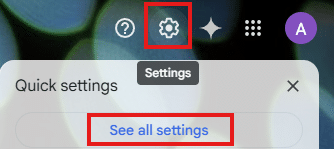
From your inbox, click the gear icon to view settings. Then, click See all settings.
Once you see all the settings, you can choose to create labels. You can also do this from the inbox window itself. Just click the plus sign where Labels are shown. Add your label, and choose where this label belongs. You can keep it as a sub-section of your inbox and even create labels within labels if you wish.

Inside settings, you can adjust how the labels show up, and decide if they should appear in the message list. You can also change actions for the label. One example could be if it should show up in a different place in your inbox structure.
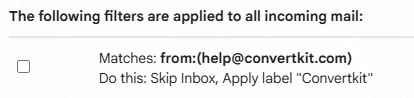
The next setting to look at is in the section Filters and Blocked Addresses. This is where you create the actual filter. For example, you can create a filter that directs emails from a specific address to skip the inbox and apply a certain label. This way, the email never shows up in the default inbox section. Instead, it’s sorted under the label you just created.

Example 1:
If you receive an email from a specific address, it can skip the inbox and apply a label you’ve created.
You can also edit your filters or delete them entirely from this section. Another action you can add is to ensure that emails from that sender are never sent to spam.
Example 2:
Make sure emails from a specific sender are never marked as spam.
If you create labels as a way to clean up a full inbox, make sure to apply the filter once it has been created. This way, you can see the result right away.

Conclusion
Creating email filters in Gmail is a powerful way to streamline your inbox and enhance your productivity. By using filters to automatically sort incoming emails, you can ensure important messages are prioritized and your inbox remains organized. Whether you’re using Gmail on a web browser or a mobile app, the process is straightforward and can significantly improve your email management.
Remember, setting up filters takes just a few minutes, but the benefits can save you hours of sorting through emails manually. Give it a try and see the difference it makes!
If you found this guide helpful, don’t forget to share it with your friends and colleagues. For more tips on email management and productivity, subscribe to our newsletter and follow us on social media. Have any questions or tips of your own? Drop a comment below!
As a fellow blogger, I can appreciate the time and effort that goes into creating well-crafted posts You are doing an amazing job
Thank you 🙂