
Today, efficiency and automation are seen as valuable. Why should your inbox be any different? In this post, I’ll show you how to create e-mail rules in Outlook on the web (formerly called OWA: Outlook Web Access).
Wouldn’t it be nice if some e-mails, based on set rules, were automatically moved to certain folders without you having to do anything? The good news? It’s not that hard to set up and can be done in most e-mail applications.
Why Is It Useful to Create E-mail Rules?
Think of e-mail rules as a set-up once-and-forget thing. Sure, it takes some time initially to set them up, but it can save you time in the long run. E-mail rules are a simple way to automate tasks based on the sender, subject, or other attributes decided by you.
Why Should You Care About Setting up E-mail Rules?
When I worked as a teacher, and even more so during the pandemic and remote teaching years, I worked with students sometimes sharing documents with me as long as they shared their documents on our learning platform that was one thing. But the times when I got one of those “X has shared a document” e-mails with the sharing link? These e-mails were at risk of getting lost in my inbox.
I mostly used Outlook for desktop, but this comes down to both preference and what kind of license you have. The free version of Outlook covers your basic needs and then some, which is why I’ll show you how to set up rules in both the desktop and web versions.
What I already had set up in my Outlook were folders for each class. What I was missing was a way for e-mails with this shared link to end up in one spot. The solution? Create a rule for the inbound e-mails containing the phrase “has shared a document with you”.
Each time a person sent me one of those e-mails, my Outlook automatically moved the e-mail from my inbox to a folder called Shared Documents. Inside this folder, I created or moved, the folders I had for each class.
This meant I only had to look in my Shared documents folder to find the e-mail, and quickly drag the e-mail to the correct sub-folder. It might seem like a small thing, but it helped me keep track of where my shared links ended up, as well as help me manage my inbox and keep it somewhat under control.
How to Get Started
Before you begin, it’s a good idea to know what kind of rule you wish to set up and why. This can also help you troubleshoot things if the rule doesn’t work as intended.
In Outlook as a Web App (OWA)
To find the settings, start by clicking the cog wheel found in the top bar of your browser.
Next, go to mail and choose Rules.

From here, choose Add new rule.
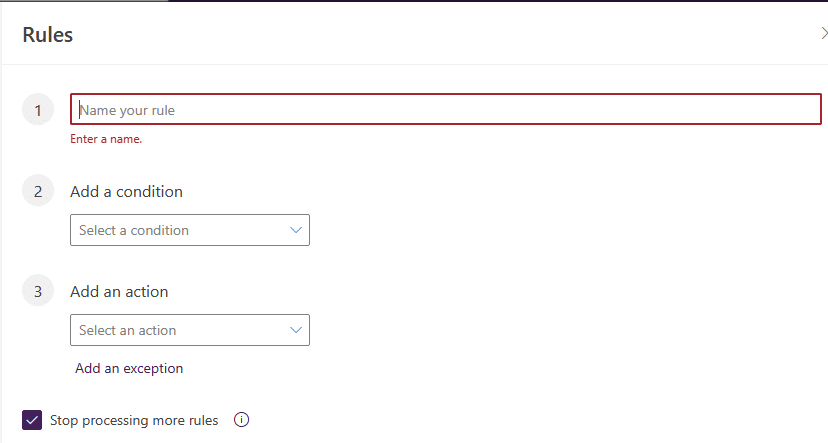
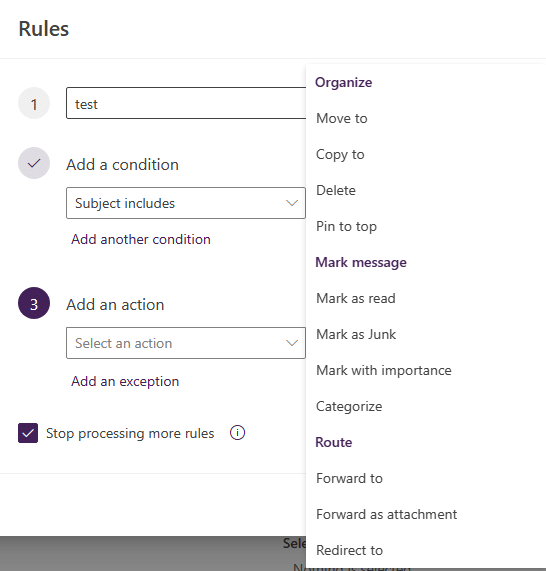
Start by giving your rule a name. My tip is to make the name clear and informative, as to what the rule is supposed to do.
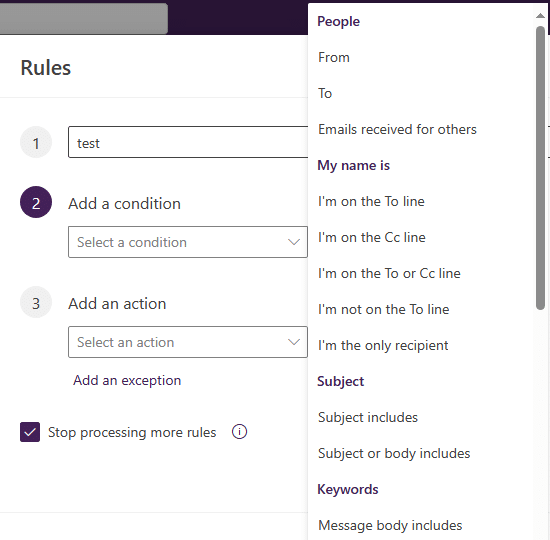
The second thing you need to do is set the conditions for when the rule should be applied. It helps if you think through what you want the rule to do. For example, you can create a rule that applies when you receive e-mails from a specific sender, if there are certain words in the topic and much more. It is possible to use more than one condition for the rule you create.
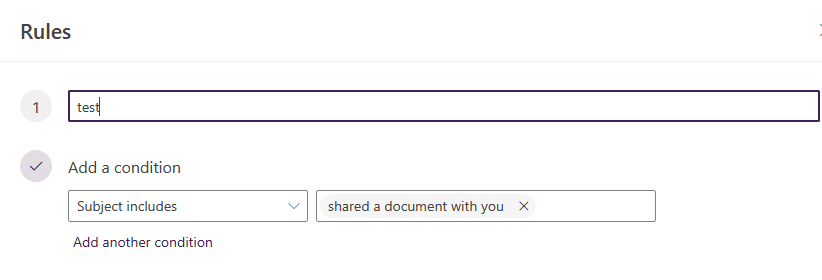
The third and last thing to add is an action. This is where the magic happens. I’ll use a version of the rule I mentioned above.
In this case, my condition is when the words “have shared a document with you”. The action of choice here is the one called Move to.
Once selected, you are given a drop-down menu where you can choose the folder of your choice. When I did this and used it for moving shared documents, I created the folder first, then the rule. You don’t have to do it in this order though, since you are given the option to create a new folder if you need to.
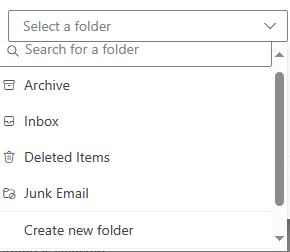
Once you’ve created the rule, click Save and you’re all done.
The desktop version of Outlook is similar to the web version, even more so if you use the new version of Outlook where the interface is close to identical.
Conclusion
Using e-mail rules can be helpful and a nice way to make sure your inbox is nice and tidy. It can help you perform some tasks automatically based on conditions and actions decided by you. In turn, it can help you master your inbox and ensure you know where things are and don’t miss anything important.
E-mail rules are easy to set up and once they are in place, you can relax and let them do the job you assigned them to do.
A quick summary:
- give your rule a clear name, making it easy to find and understand what the rule does
- choose a condition that triggers the rule
- choose the action taken when the rule is triggered
And you are all set! Do you have a good example of e-mail rules you frequently use?