
One thing I stumbled upon a few months ago is calendar blocking and while most examples I found were using Google Calendar, I choose to do calendar blocking in Outlook.
Who doesn’t love to be organized and feel on top of things? I know I do, but does this mean I am always where I’m supposed to be with planning and managing my time? Nope! However, there are some things you can do to help you stay more organized even when the semester starts picking up and things get really busy.
The concept is hardly new, but it’s one you can easily incorporate in your own work (and perhaps outside work too!). I’ve always used a calendar and I’m a queen at writing lists, but I still feel overwhelmed sometimes. Really, who likes tossing and turning in bed at night being afraid that you’ve actually forgotten to do something that might impact the next day/week in a negative way?
This is why I looked more into this method and I will show some examples of how I’ve tweaked my own use of calendar blocking using Outlook during the spring semester of 2020.
So What Is Calendar Blocking?
The easiest way to describe this is probably that you use your calendar to estimate how long time a certain task will take, and then use your calendar of choice to make sure you have time to actually get the task done.
The method itself is not new and really easy to use, no matter whether you prefer an analog medium like a classic to-do list, in a bullet journal – or if you want to do the same things but in a digital setting. One thing to keep in mind to actually make this work is that all things you do take time. Yes it’s silly I know, but I have a feeling I might not be the only one trying to squeeze in too many things to do in a too short amount of time ???? Once you get the hang of this though, it does give more peace of mind.
So what are the actual steps to calendar blocking? Well, the first step is the same no matter the method: identify the tasks you have at hand. After that, it’s up to you where you wish to write it down, as well as whether you decide to just write it down as one task or if you create a task with sub-tasks. It is that easy and that simple.
How I Tweaked the Method to Work for Me
Personally, I use both methods depending on what the actual task is. If I plan to film a video giving instructions to students or colleagues, then I usually give the task a name and write down the different steps I wish to include to make the final product the best I can. However, if the task is simply something short along the lines of “reply to e-mail from X”, then sub-tasks are not necessary.
One video that shows this fairly well, including the use of color-coding, is Jessica Stansberry’s video How to use CALENDAR BLOCKING to get More Done! In the video, she uses Google Calendar, but this could easily be done using Microsoft Outlook if this is the system your school runs with. So how can you get started?
First, I would start by adding the static parts of my schedule into Outlook. Sure, adding times for lessons manually (if need be) to my calendar takes some time but the upside is that I only need to do it once and set these “meetings” to repeat until the end of that semester. I usually go through the schedule and remove lessons from days I already know will be a day off.
Color-Coding Helps!
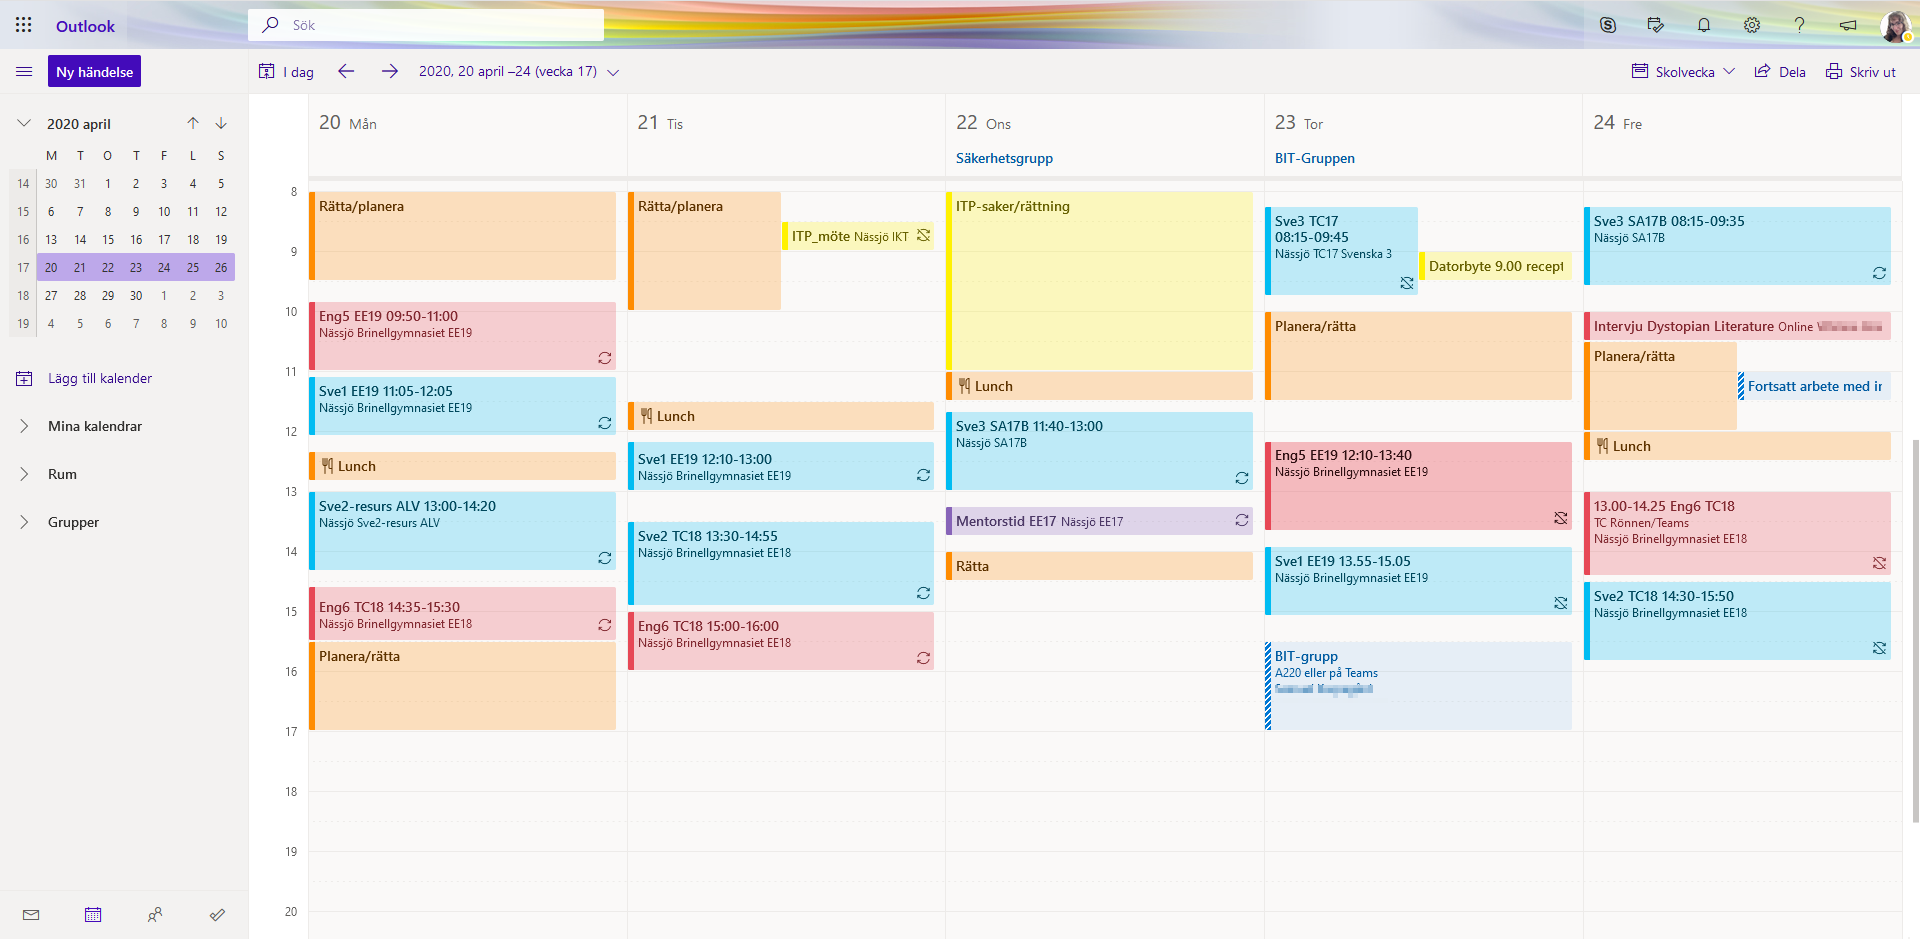
I teach two subjects: Swedish and English and associate these with different colors. In fact, color-coding gives me a quicker overview when just giving my calendar a glance. In my case English is marked as red meetings, Swedish is marked as blue, IT meetings are yellow, team meetings are pink/purple, and so on.
By giving these different meetings different colors, it’s easy to spot what is going on that specific day. Here is an example taken from a week last semester, viewed from the web login for Office 365, be warned that it’s all in Swedish though ???? The items added first are the lessons which can be spotted both through color (mentioned above) as well as you can see when the lesson starts and ends.
Next Step – Add Your Items!
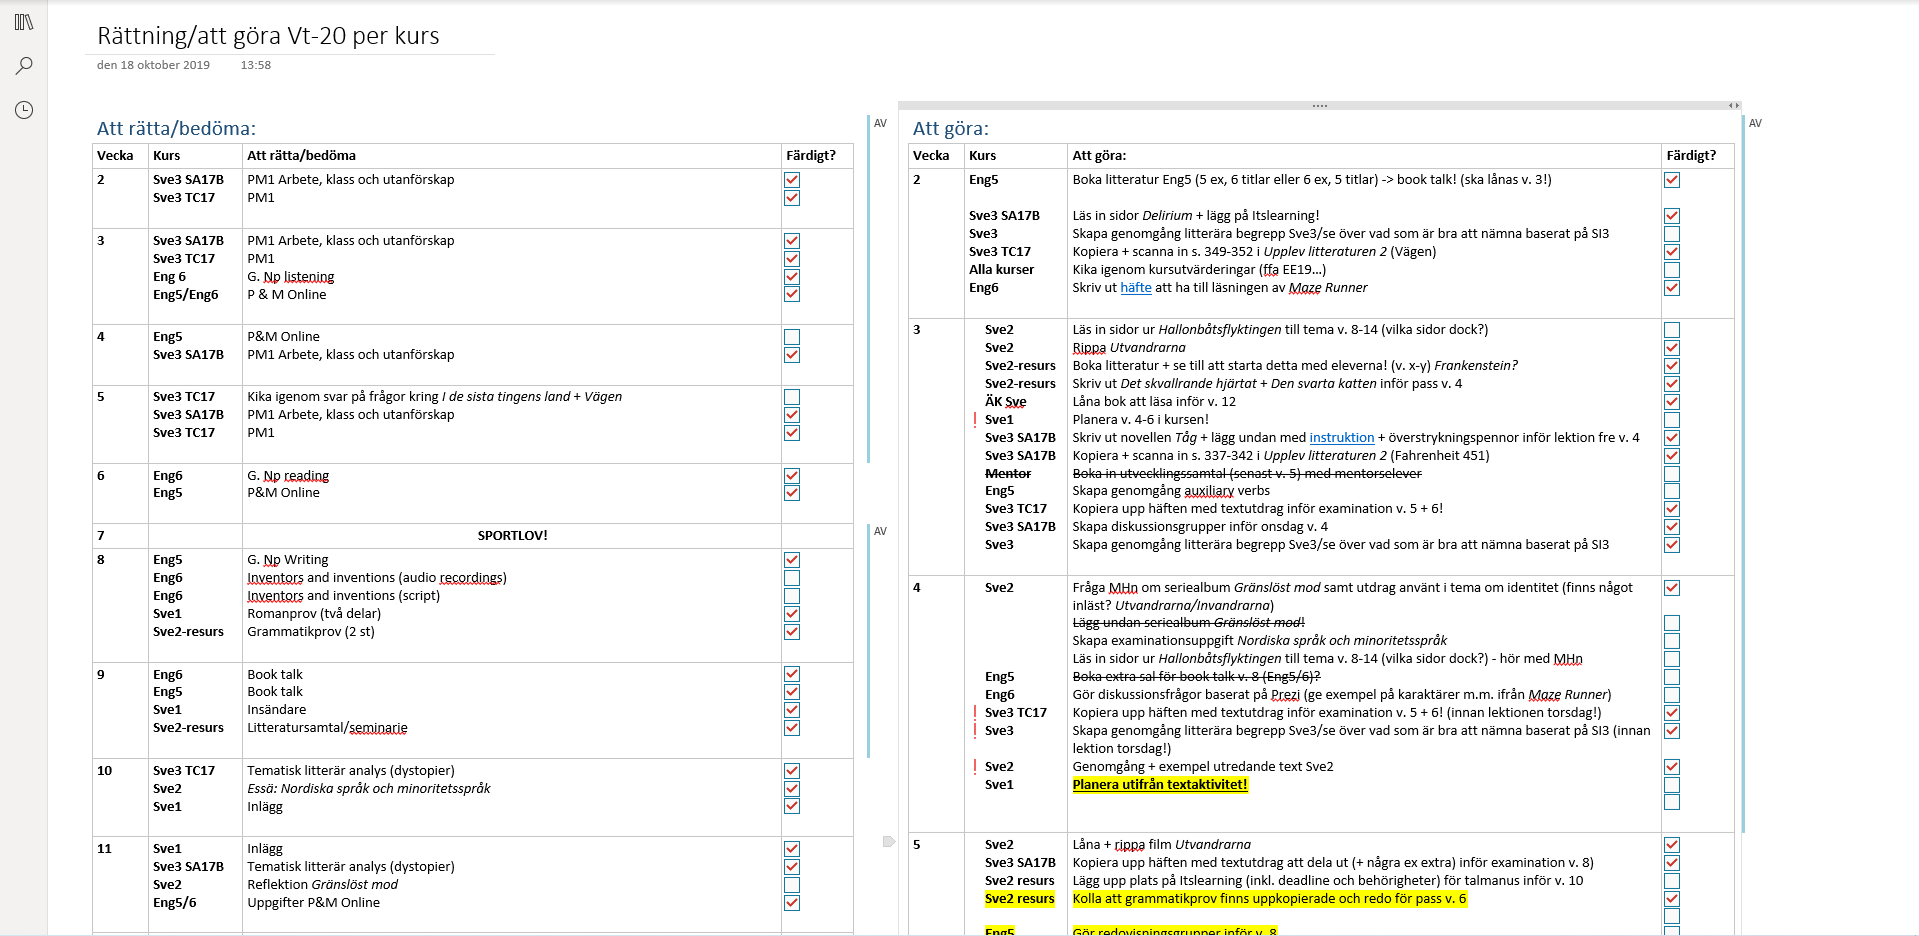
Once I have my schedule set up, I can also spot the time in the day I have to plan lessons, assess work from students, and so on. Now I’m a huge fan of Microsoft OneNote and this was a true lifesaver during the spring of 2020. What I did was create a table divided into weeks, what to do and for which group this was for.
This was the place where I stored and took note of all the things I needed to get done. More often than not, this is also the place where I made sub-tasks. Sometimes I have yellow highlight added to the text, this means that the task is crucial and almost overdue… Using a digital place to store my tasks was useful since it’s easy to move to another day or week if necessary.
The next step was to add time for planning in my calendar and assign a color for this as well. This was a good idea since it gave me a visual as to how much time I actually had on my hands.
The next thing I would do was to take a look at what needed to be done for a specific day, take a look at that day and then go into one of the blocks for planning (orange blocks in the picture above) and add some bullets with things that I would try to get done during that time.
This worked fine during the fall of 2019, during spring of 2020 I added even more color inside my notes to show which things I actually got done and what I needed to move to the next day.
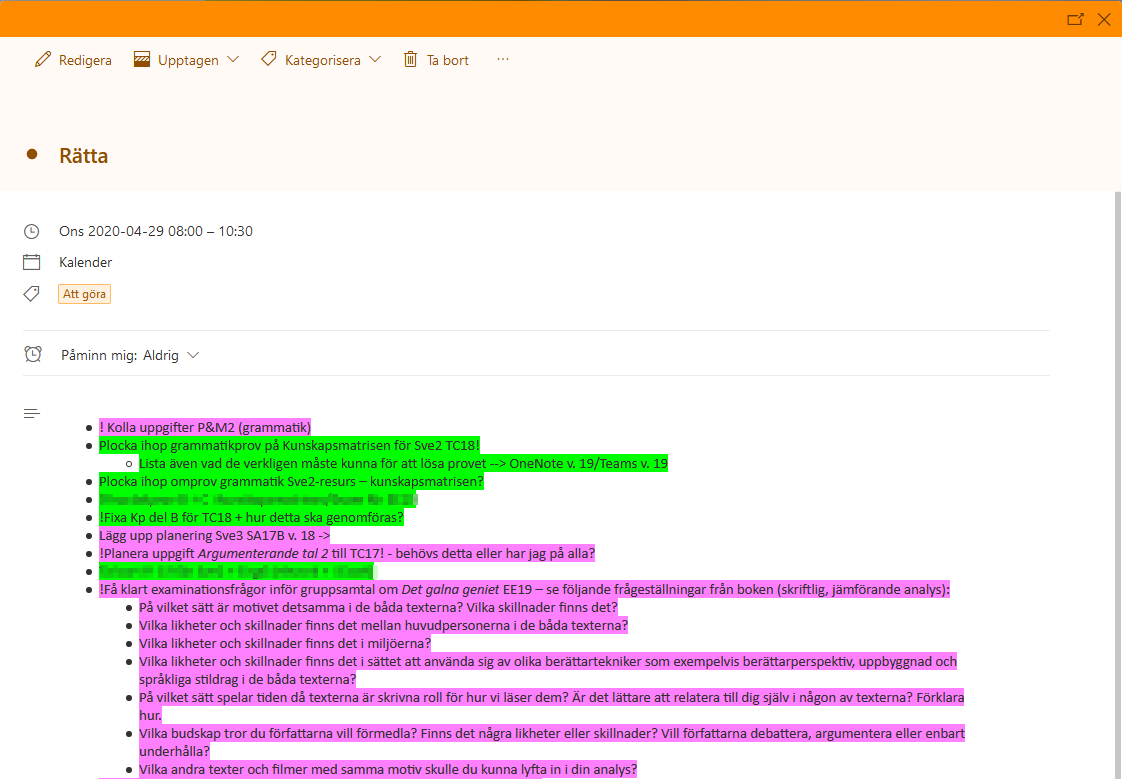
I colored the things I got done using a green highlighter and used a pink/purple highlight to indicate things I didn’t complete. The next step was to copy the things that I didn’t finish over to the next available time for planning.
This helped me a ton when I had plenty of things on my plate and quickly showed me what I had done and which tasks still needed my attention. One thing I noticed is that breaking down bigger tasks into subtasks is sometimes useful, but doing this too much can make you feel a bit overwhelmed. My best advice here is to try it out until you find the perfect balance and fit for YOU.
Conclusion
Going into the new semester, I think I will keep the same system since it worked out pretty well during spring ???? If you wish to take a more in-depth look at calendar blocking (again in Google Calendar) I recommend taking a look at Amy Landino’s video GET MORE DONE WITH CALENDAR BLOCKING It is rather long at 28 minutes, but then you get to see good examples of how she set up the whole thing from start to finish.
Have you tried calendar blocking?
What are your best ideas to stay on top of all your tasks and meetings?